This guide explains how to upload receipts and invoices to Dext using the mobile app, website, email, or Invoice Fetch.
Content Shortcuts
Using the Dext Mobile Application
Download the mobile app for iOS or Android:
iOS: Dext: Expense Tracker App
Android: Dext: Expense Tracker App
Capturing receipts and invoices (Mobile)
Submitting items through the mobile app is simple:
- Open the mobile app
- Take a photo of your receipt
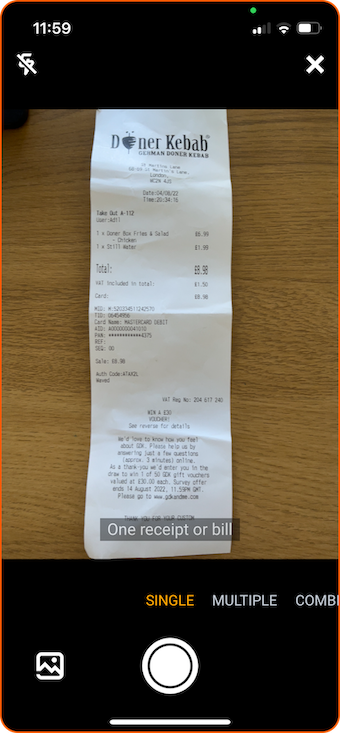
Camera modes (choose the right one)
The mobile app includes multiple camera modes to help you capture documents accurately:
- Single Mode Use when you have one document on one page.
- Multiple Mode Use when you have several separate documents. You can take up to 50 photos, and Dext will split each photo into its own item.
- Combine Mode Use when one document spans multiple pages or the receipt is very long. You can take up to 50 photos, and Dext will combine them into one item.
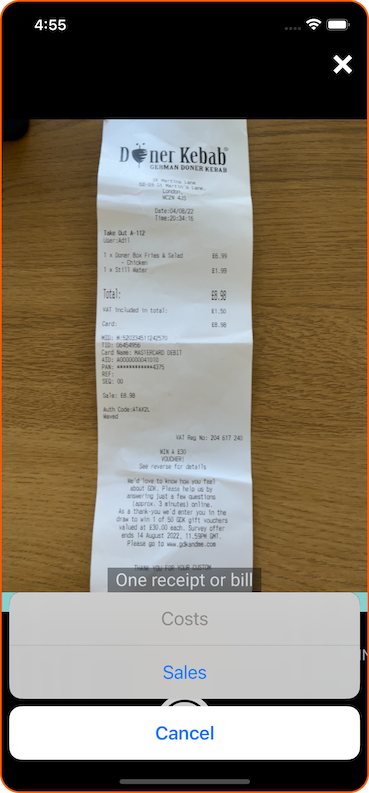
- Select Costs or Sales
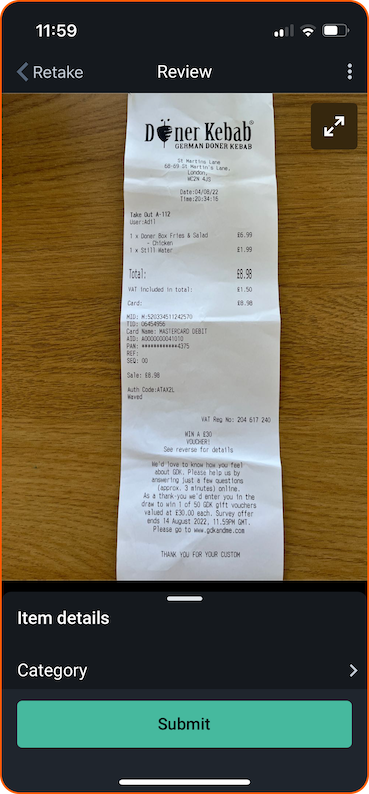
- Review
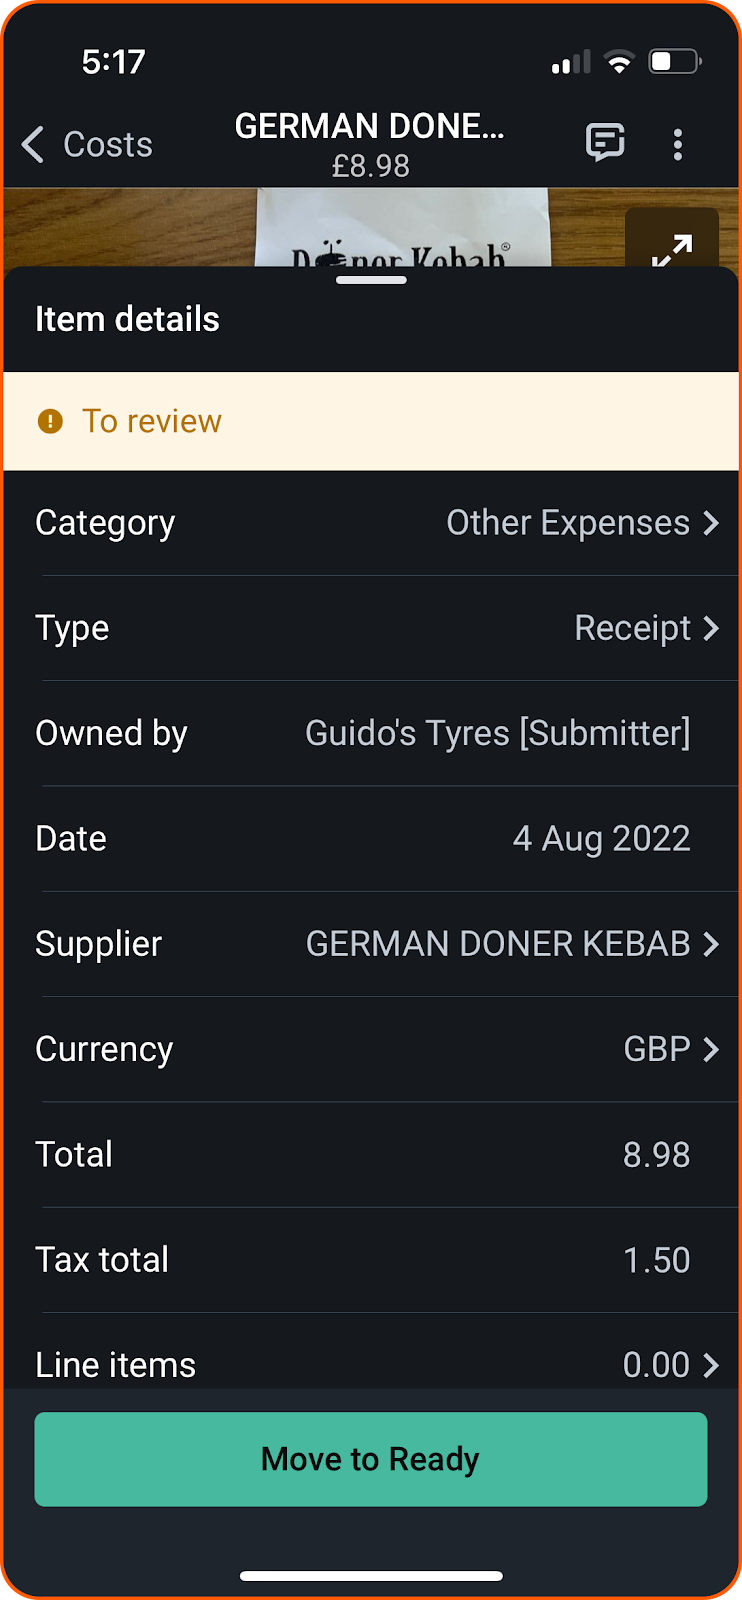
After capturing the image, you can add additional details before submitting.
- Press Submit.
Once submitted, the item will appear in your inbox after processing.
Using the Dext Website
Uploading receipts and invoices
To add a new Costs document:
- Click the green + Add Documents button at the top of the page

- The Add Documents panel will open on the right side of the screen
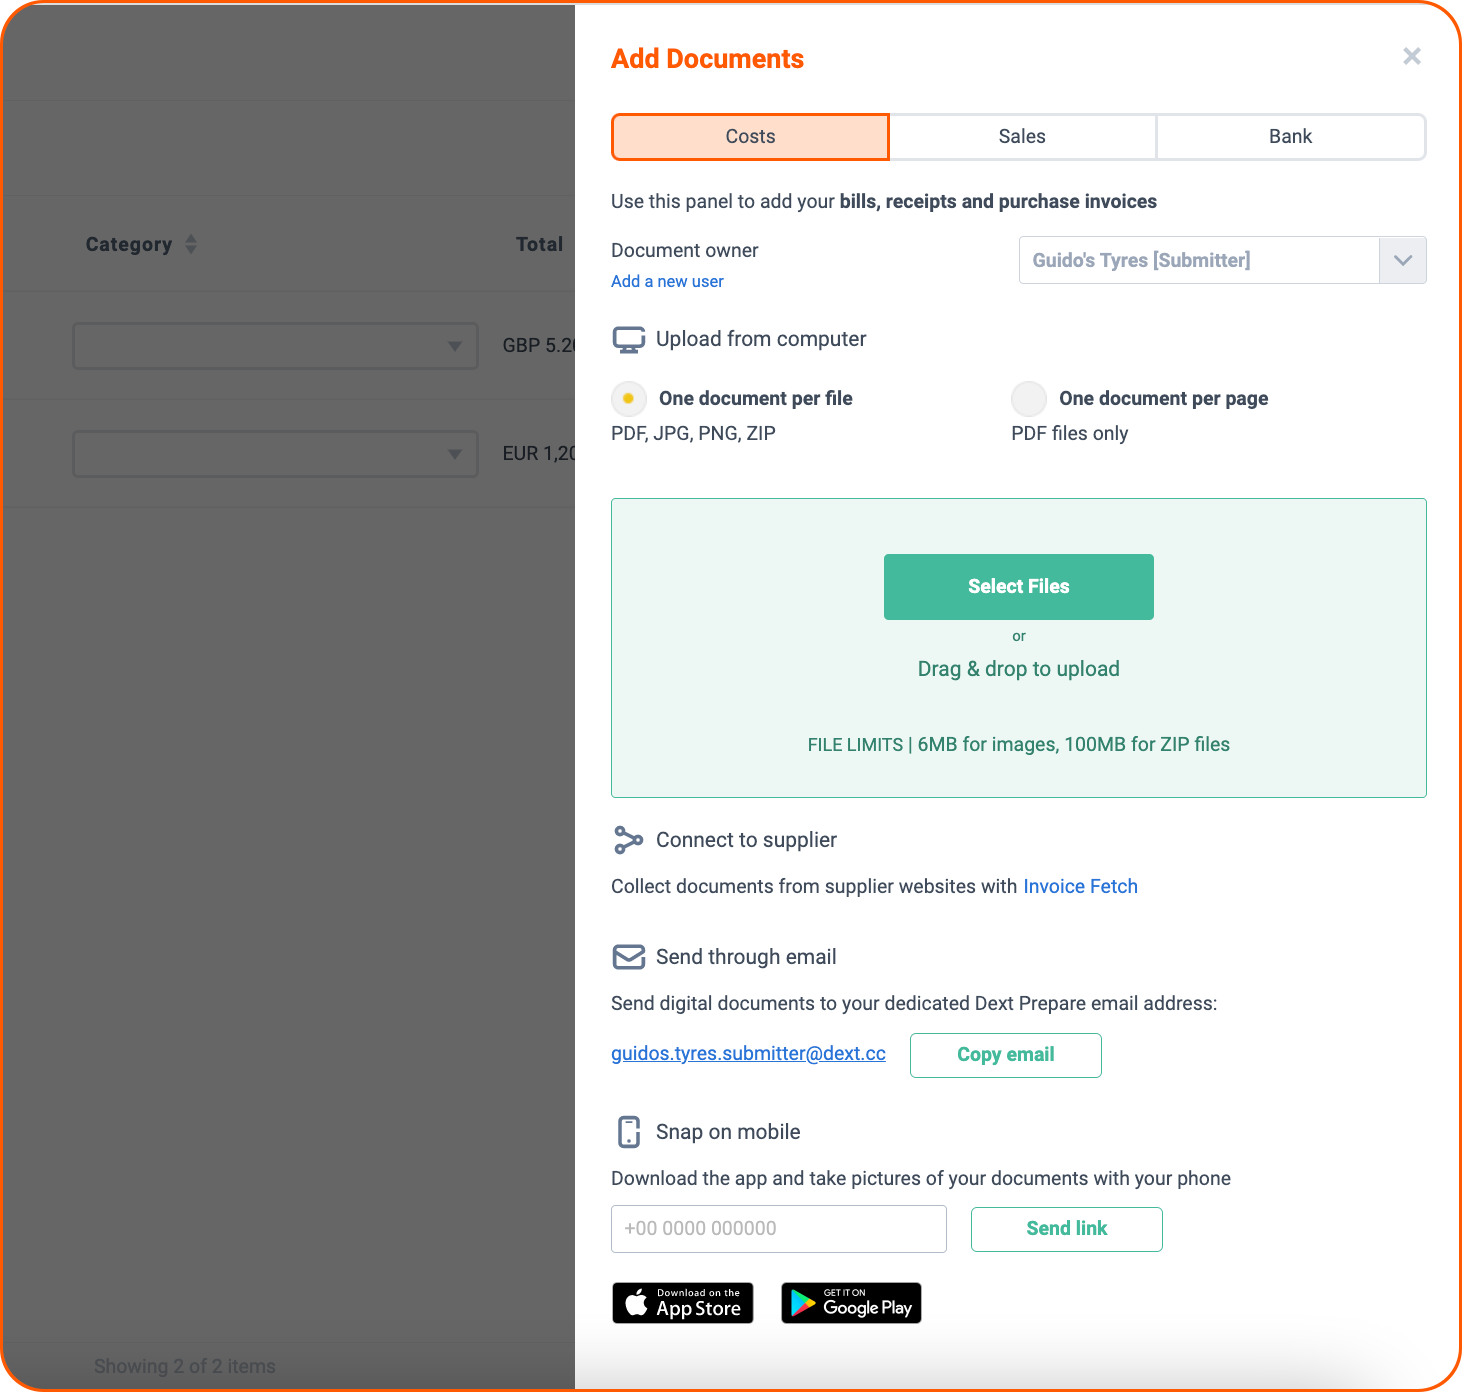
- Click the Costs tab
- Select a Document owner
If you don’t want to assign a document owner (for example, rent expenses for the business), select None.
Choose your upload method
You can upload documents using any of the following:
- Upload from a computer.
- Connect a supplier using Invoice Fetch.
- Send via email to your dedicated Dext Prepare email address.
Supported file formats
Dext can extract documents in these formats:
JPG, PNG, GIF, BMP, TIFF, HTML, PDF, DOC, DOCX, ODT, RTF
File size limits:
Images: up to 6 MB ZIP files: up to 100 MB
Once uploaded, documents will appear in your Costs Inbox after processing.
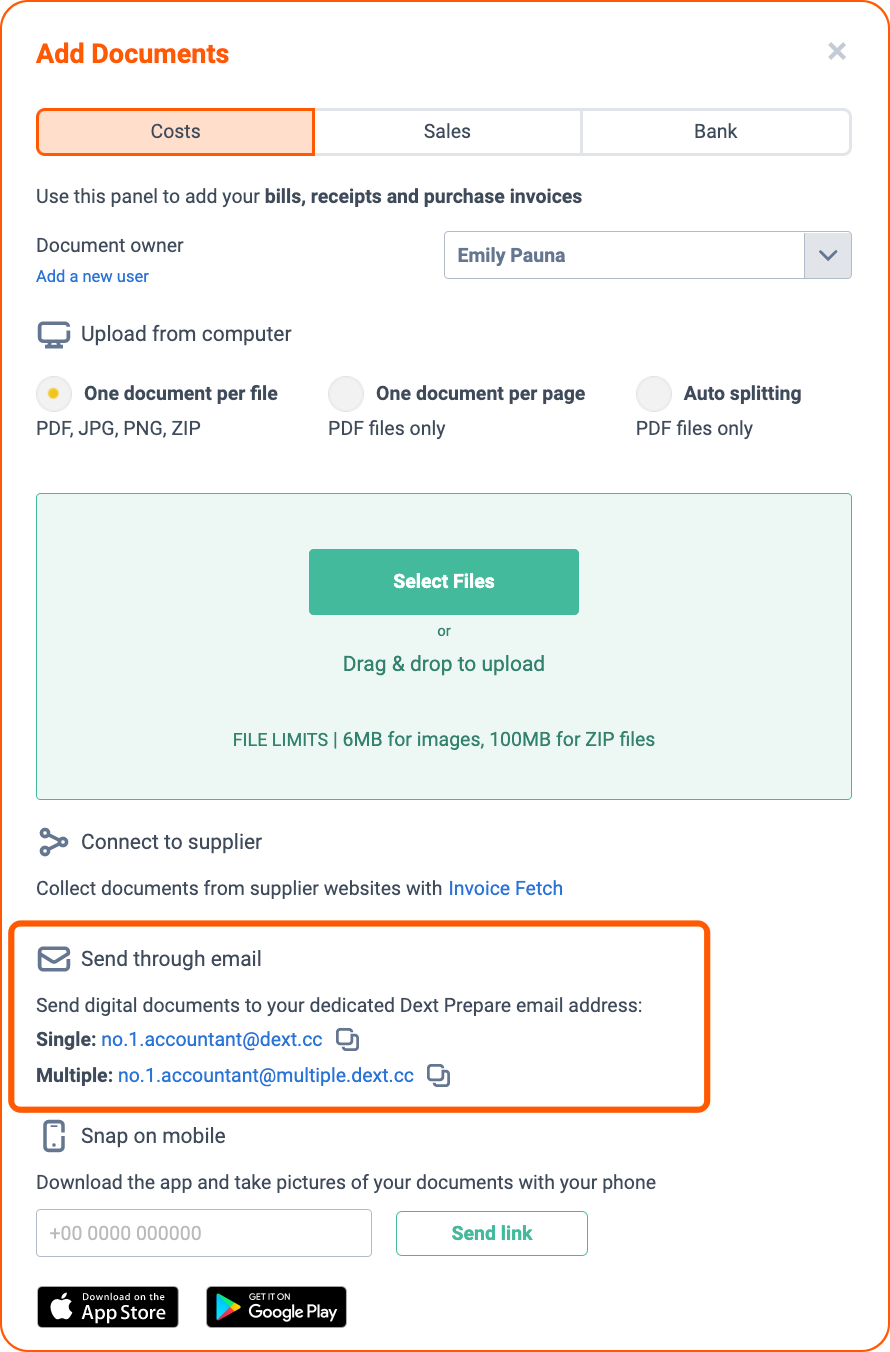
Emailing receipts and invoices
When you email a receipt or invoice to Dext, it will automatically be extracted and added to your inbox.
Documents can be:
- Included in the email body, or
- Attached to the email
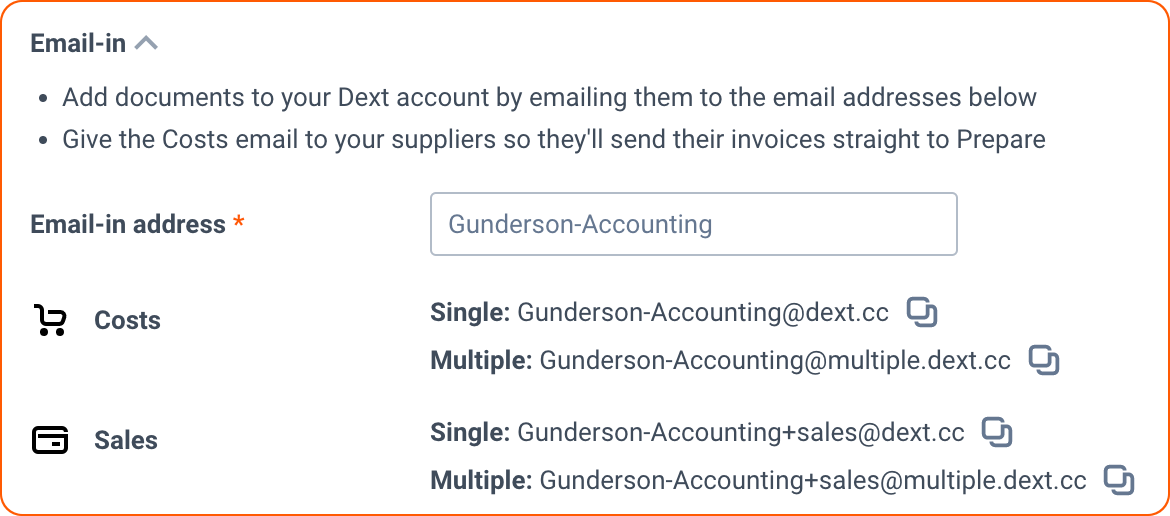
Email addresses (Costs vs Sales)
- Costs documents: customname@dext.cc
- Sales documents: customname+sales@dext.cc
Each Dext user has a unique email-in address created during setup.
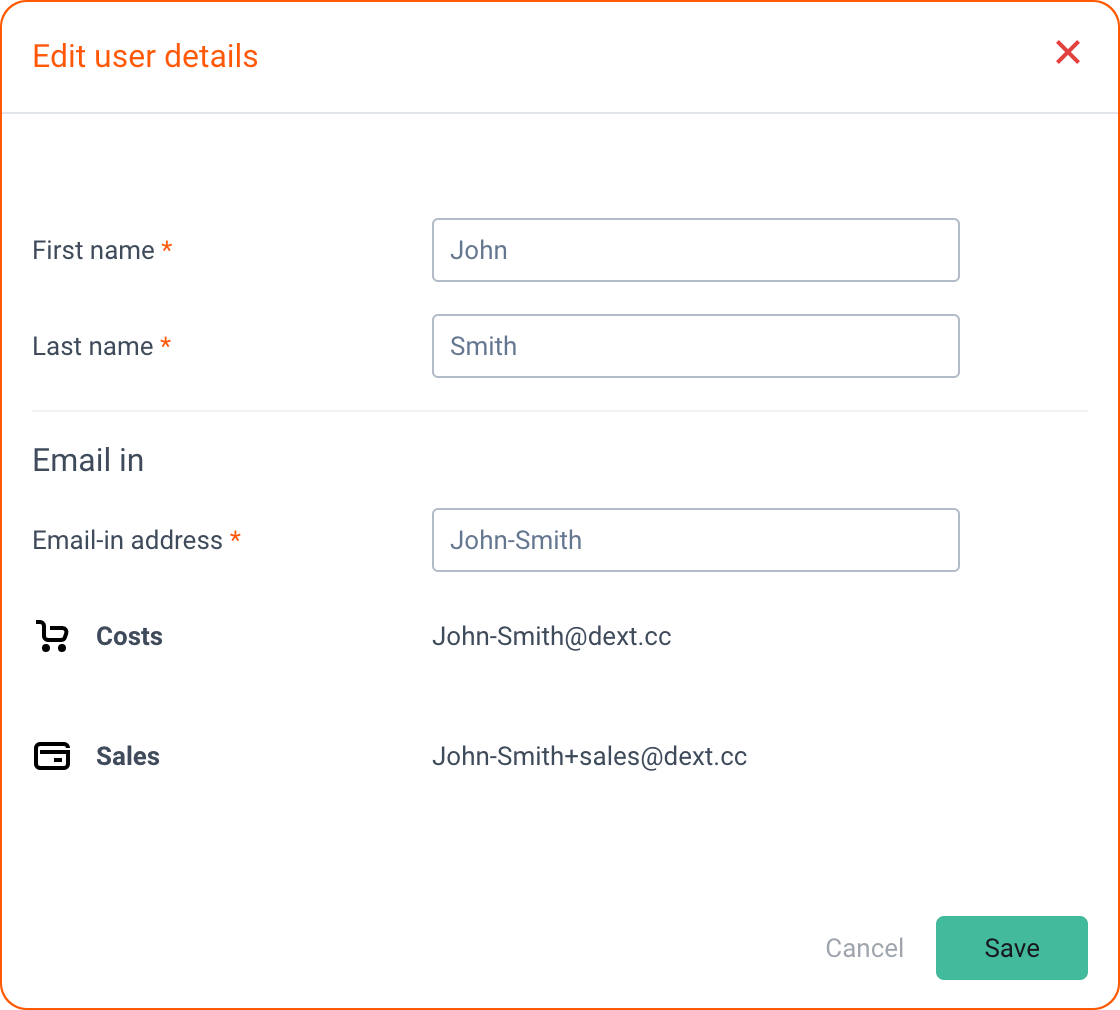
Changing you email-in addres
You can update your email-in address from:
My Profile → My Details
For other users:
- Go to My Users
- Click Manage
- Select Edit User Details
- Update the custom name
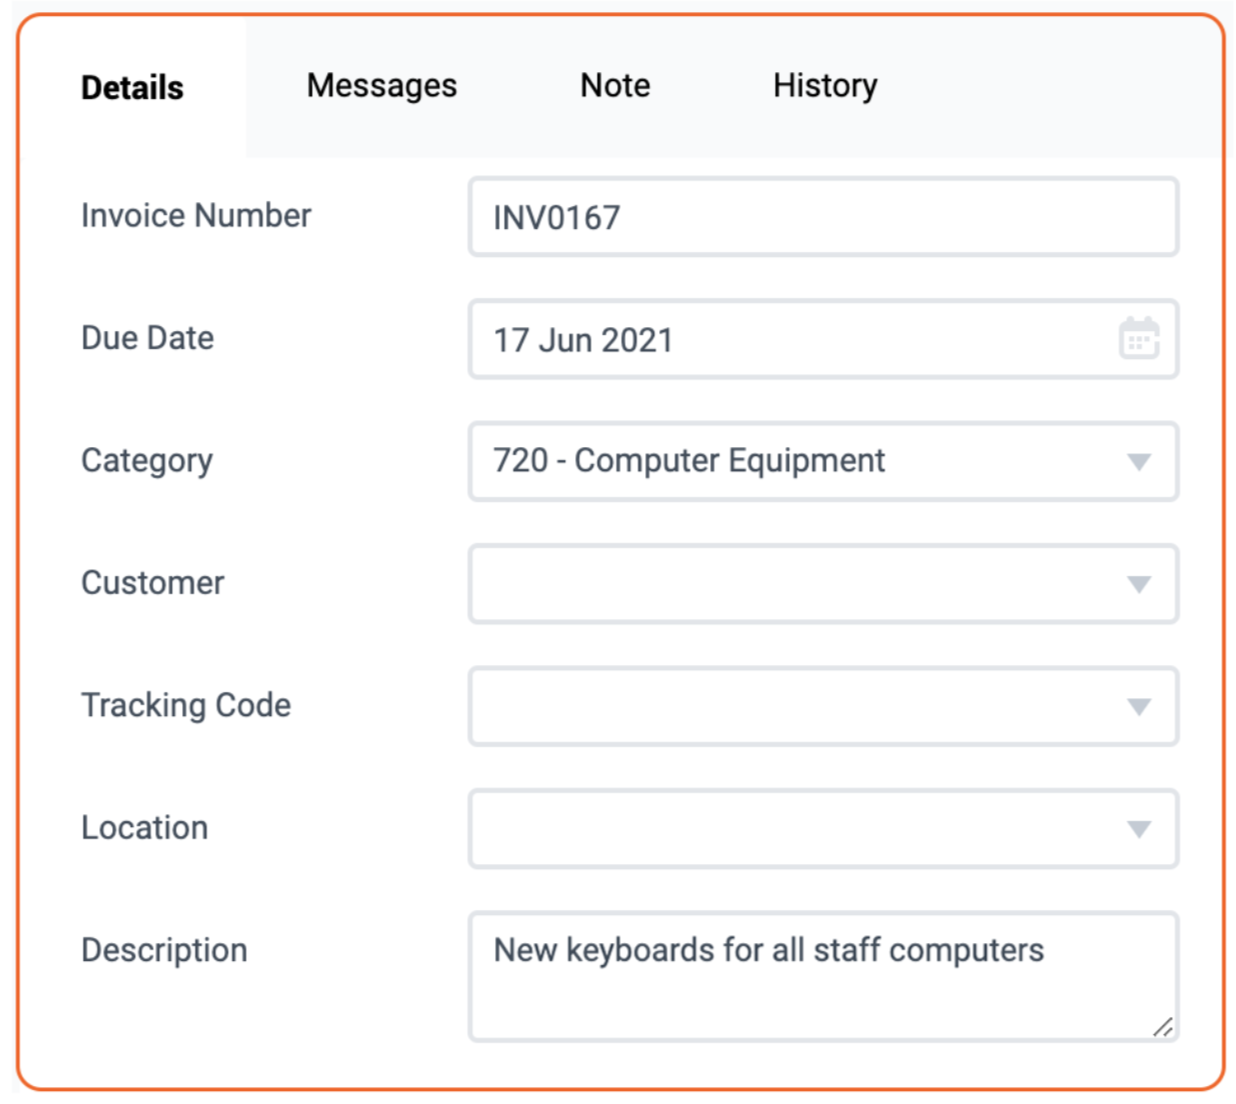
Adding a description to your documents
To add a description, type it between two #note tags in the email body.
Example:
#note New keyboards for all staff computers #note

The description will be applied automatically once the document is processed.
Submitting multiple documents by email
You can submit multiple documents in one email by either:
- Attaching multiple individual files, or
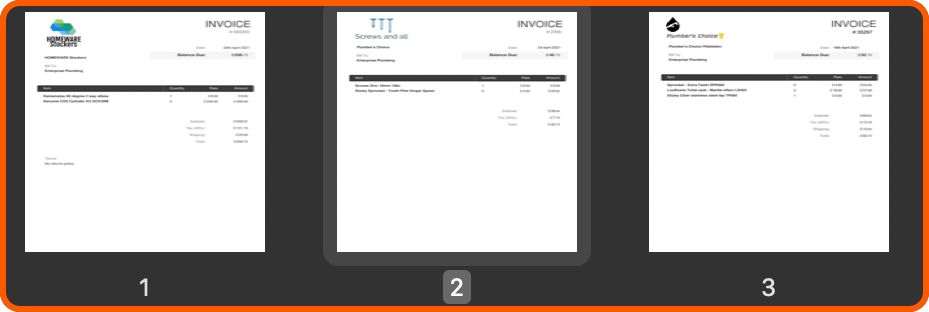
- Sending one PDF with multiple invoices, one per page
Multiple costs documents
For multiple Costs documents, send them to:
customname@multiple.dext.cc
Example:
Nathan Campbell sends three PDFs containing multiple invoices to:
nathan.d.campbell@multiple.dext.cc
Dext will split each page into individual items and add them to the Costs Inbox.

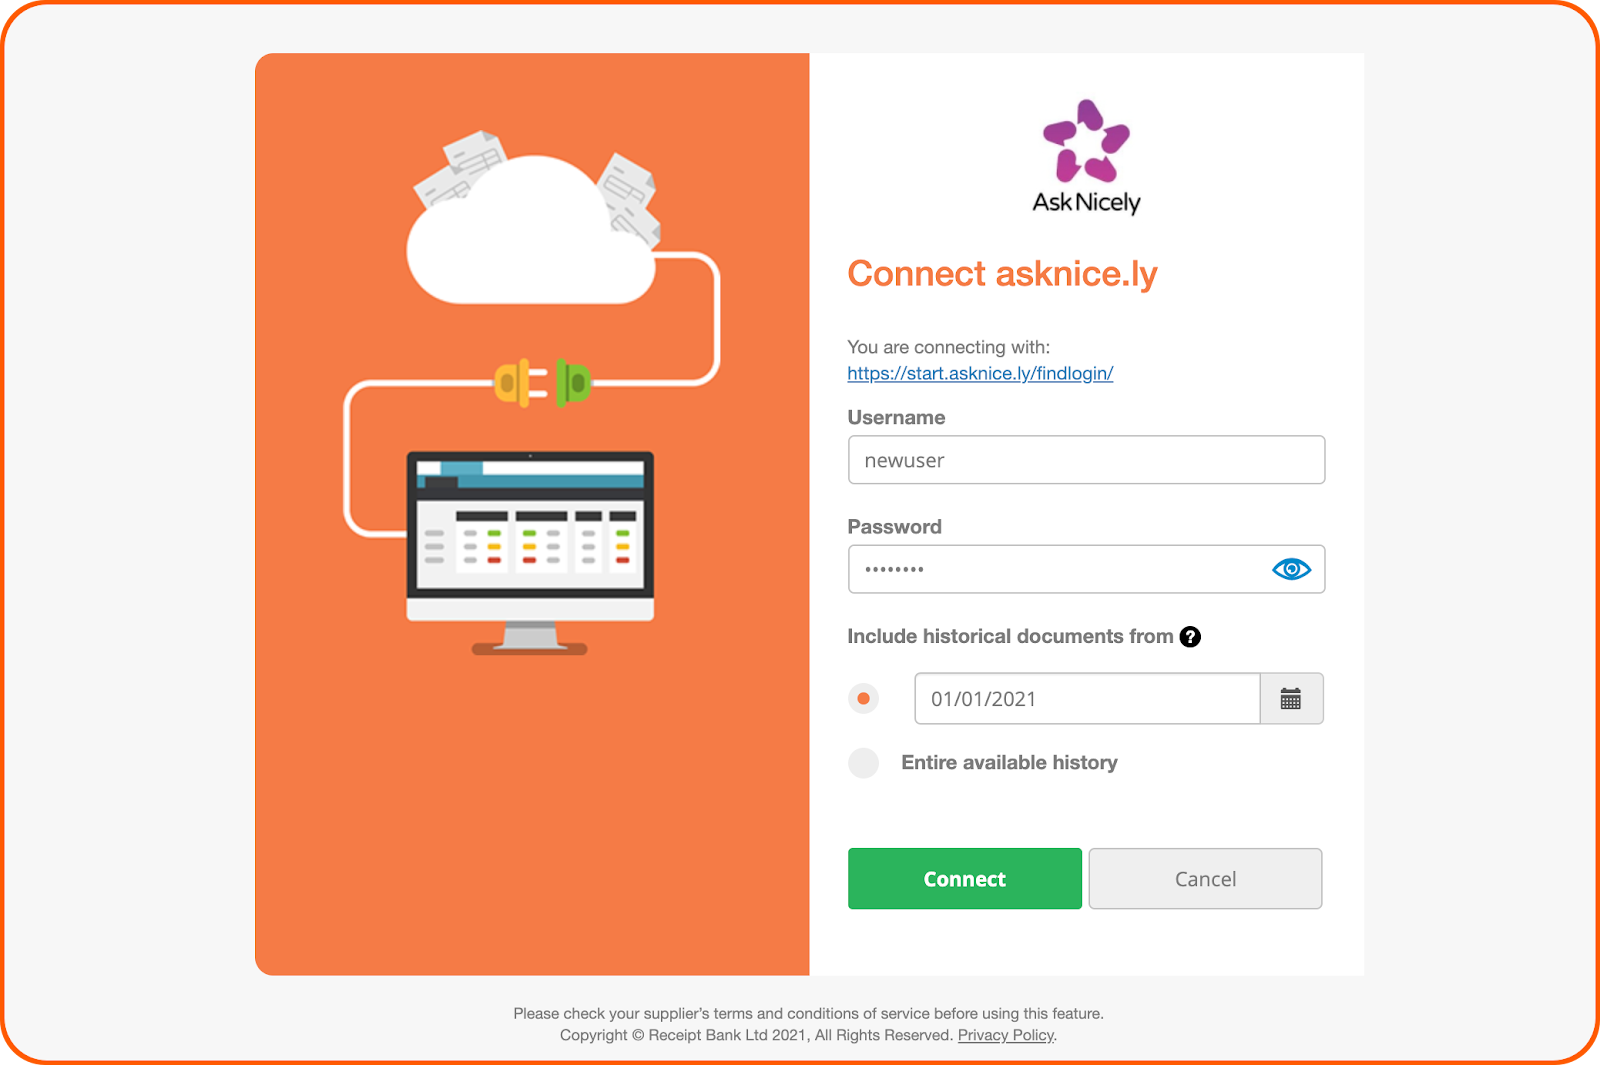
Setting up an automated Invoice Fetch connection
Invoice Fetch automatically pulls invoices from supplier portals.
- Click Connections in the sidebar and choose Costs or Bank
- Click Full List and search for your supplier or bank.
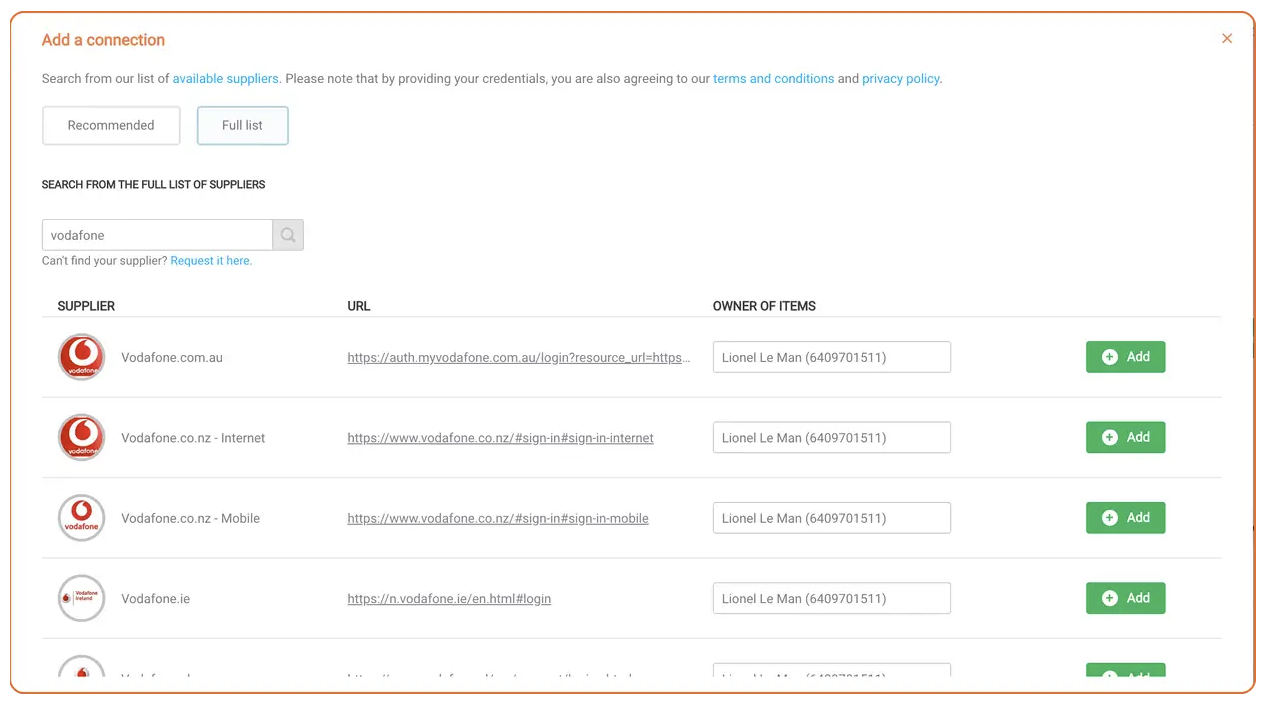
- Log in using the supplier portal credentials
- Choose whether to import:
- All historical documents, or
- A specific date range
- Click Connect
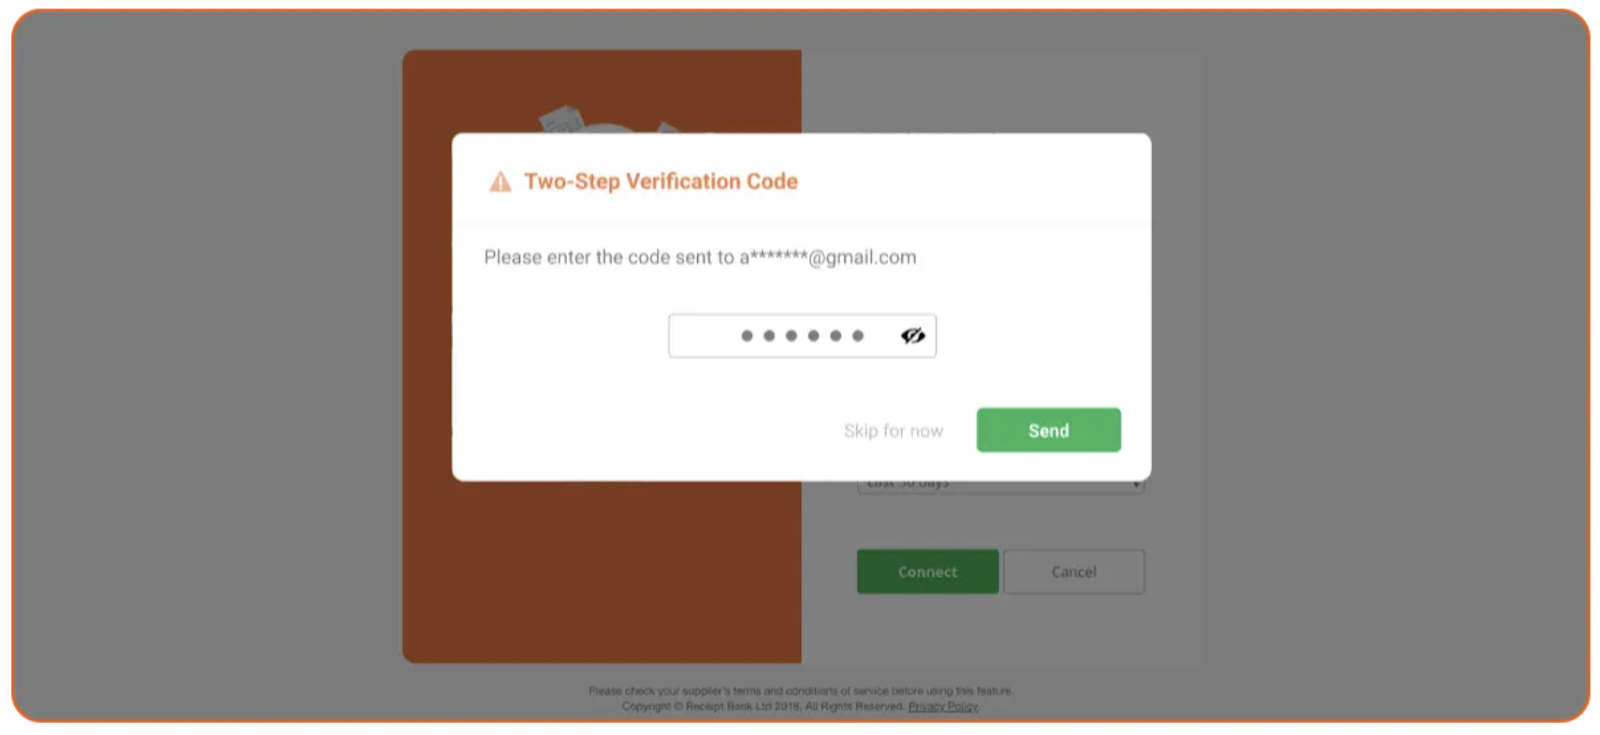
During setup
- Keep the browser tab open while the connection completes
- If prompted for 2FA, enter the one-time code sent by SMS or email
What happens next
- Existing documents are imported within 48 hours
- New documents are fetched weekly
- The connection status will show Login Successful
You can edit or delete connections from the Connections page.